|
|
Bug Base Manual
|
Using Bug Base
|
|
Bug Base usage is completely web based. Depending upon
the installation, the
entry page can be reached with:
http://<hostname>/bugbase/index.jsp
|
Page Layout
|

The page is separated into two parts: the navigation
bar on the left side and the main window on the right
side.
The navigation bar contains status
information (user and project), links to Bug Base tasks
(new bug report, view and edit, developer applet and
administration applet), the language selection and a link
to the manual.
The contents of the main window depend
upon the selected task.
|
Page Layout
|
|
The page is separated into two parts: the navigation
bar on the left side and the main window on the right
side.
The navigation bar contains status
information (user and project), links to Bug Base tasks
(new bug report, view and edit, developer applet and
administration applet), the language selection and a link
to the manual.
The contents of the main window depend
upon the selected task.
|
Registration
|
 Bug Base is only accessible for registered users. Hence,
users have to register first. This can be done from the
initial login page. Click either on the link "Register as
new user" in the navigation bar or on "register" in the
main window.
In order to register please fill out the registration form:
Bug Base is only accessible for registered users. Hence,
users have to register first. This can be done from the
initial login page. Click either on the link "Register as
new user" in the navigation bar or on "register" in the
main window.
In order to register please fill out the registration form:
- userid: Select your user ID.
- password: Enter your password.
- name: Enter your full name.
- email: Enter your email address.
Press the Submit button to finish the
registration. This will lead you to the login page.
userid and project may be
set as request parameters for index.jsp.
|
Login
|

Enter your user ID and your password either in the main
window or in the navigation bar. If you are not a
registered user, please register first.
Bug Base may manage multiple the bug reports for
several projects. Hence, the login is project
specific. Please select the desired project.
Press the login button to enter Bug Base.
A successful login will lead you to the entry page. Now you can
view and modify bug reports and
submit new bug reports.
|
New Bug Reports
|
 Fill out this form in order to submit a new bug report:
- title: Title of the bug report.
- package: The project package, where
the bug occured. If their is no suitable package,
please contact your bug base administrator to add a
new package.
- description: Detailed description
of the bug.
- bug level: Level of the bug report.
- user group: The group of users for
which this bug report should be visible.
- attachment: You may add an
attachment (screenshot etc.).
Press the Submit button to submit the bug
report.
|
View Bug Reports
|
 Bug Base can be searched for existing bug reports. The
returned list can be restricted using search and filter
criteria:
Bug Base can be searched for existing bug reports. The
returned list can be restricted using search and filter
criteria:
- search text: Restrict the list to
bug reports containing the given text either in the
title or in the description.
- filter: Restrict the list to bug
reports to reports with a certain status.
Press Show bug reports button to retrieve
the list matching the search criteria.
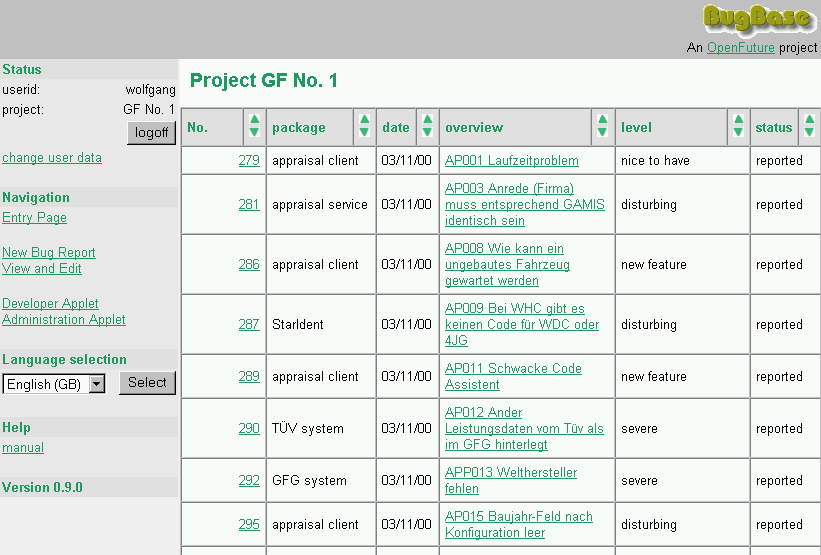
The list of bug reports matching the search criteria is
displayed. The list may be sorted ascending
( )
and descending
( )
and descending
( )
columnwise. )
columnwise.
From this list, a single bug report may be selected to view
details. Please click on the link behind the report number or
title.
 The detailed description of the bug report is displayed.
|
Edit a Bug Report
|

Starting at the detail of a bug report (see View Bug Reports), the selected bug report
may be edited following the Edit Bug
Report link. A form is presented similar to to the
form for new bug reports. Additionally,
you may modify the bug status.
Note: The user must belong to the group
doctors to modify bug reports.

Press Submit to save the changes. After
saving the changes, you may send an email to the author of
the bug report to notify him for changes.
|
Developer Applet
|
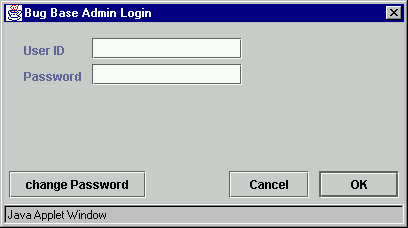
 Developers have a second access to the list of bug reports
using the developer applet. When opening the applet page, a
login window is presented:
Developers have a second access to the list of bug reports
using the developer applet. When opening the applet page, a
login window is presented:
After successful login, developers may modify existing bug
reports and submit new bug reports. For each task, there
exist one tab panel.
Managing Bug Reports
The managing panel contains an overview panel in the upper
part and a detail panel in the lower part. The desired bug
report can be selected in the overview panel. In the detail
panel, the bug report can be managed.

- Filtering: With filter criteria, the list of
displayed bug reports may be restricted to bug reports
with certain report status. Filtering can be done along
the four stati a bug report may have: reported,
started, fixed and rejected. Press
the Refresh button to apply the new filter
criteria.
- Sorting: The list of bug reports may be sorted
by clicking on the column headers. Holding the SHIFT
button pressed inverses the sort.
- Report Status: Initially, bug reports have
the status reported. When bug fixing is started,
the status may be set to started. After
finishing bug fixing, the status may be set to
fixed. If the bug report does not contain a bug,
its status may be set to rejected.
Hint: The status may only set back to a previous
state, if the date entry is cleared.
- Package: The package to which this report
belongs to may be changed by selecting the respective
entry from the package choice box.
- Bug Level: The level of the bug report may be
changed by selecting the respective entry from the
bug level choice box.
- User Group: Users may only view only a bug
report, if they belong to the same group as the bug
report. The group of a bug report may be changed by
selecting the respective entry from the user
group choice box.
- Fixed by: In this choice box, the responsible
user for the bug fix can be set.
- View attachment: Bug reports may contain an
additional attachment (screenshots etc.). If the
selected report contains an attachment, the view
attachment button is enabled. By pressing the
button, the attachment URL is requested in the
browser.
- Contact Author: If the author's email address
is known, the contact author button is
enabled. By pressing the button, the system's email
client is opened.

- Save: Changes in the bug report have to be
commited by pressing the Save button. The user
may decide, whether the author of the bug report should
be informed about the actual bug report state.
In the case the user presses Yes, the server
sends an email to the author containing the actual
report status and data. In any case, the changes are
stored into the database.
|
Administration Applet
|
|
There exists an applet for the Bug Base administration. The
login is the similar to the login for developers:
 The login is restricted to users belonging the the group
admin. After successful
installation an administrator user is created:
The login is restricted to users belonging the the group
admin. After successful
installation an administrator user is created:
- userid: admin
- password: bugbase
The administration of Bug Base is split up in three panels:
- General settings: This panel contains the
administration tasks, which concern the Bug Base
installation and are not project dependent.

- Projects: In the left part, new project
names may be added or existing ones deleted. Press
Save to commit the changes.
.
- User data: Users can be administrated
with the panel on the right side. If no user is
selected from the top list, new user data may be
entered. The user will be defined, when the
Add button has been pressed. Existing ones
may be modified or deleted. The modifications will
be commited by pressing the Save button.
- Groups: In the lower right part of the
panel, the groups can be managed. If the desired
group does not exist, press New to add a new
group name.
- Project administration: The project
administration panel contains a list panel for adding
and deleting new project packages.

- Project: Select the project.
.
- Project packages: Projects may be
structured by packages. On this panel, new packages
may be defined and existing ones deleted. The
modifications will be commited by pressing the
Save button.
- Database administration: This panel offers
direct access to the database via SQL.

- SQL command: Enter a SQL command in the
text area and press the Submit button to
submit the command to the underlying database of
Bug Base.
- Updating the database structure: If new
versions of Bug Base are introduced, the underlying
database may need modifications. Select the new
database version from the Updates choice box
and press Update to execute the the version
update of the database. See Concepts for
details about the update mechanism.
The results of executed SQL commands or version updates
are displayed in the Console text area.
|
Problem diagnosis
|
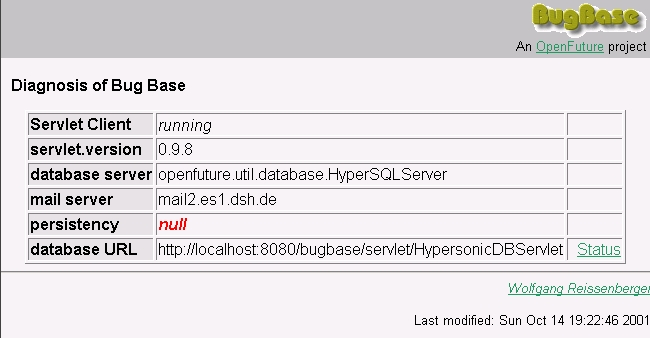
In the unlikely case of an error, a diagnosis page may
be used in order to detect the malicious configurations.
|
|
